Hey guys so in the last couple of days i have been working on Building a workflow that involve using the Microsoft word API to populate a word document template and send it out to a customer and here is a couple of things i thought id share
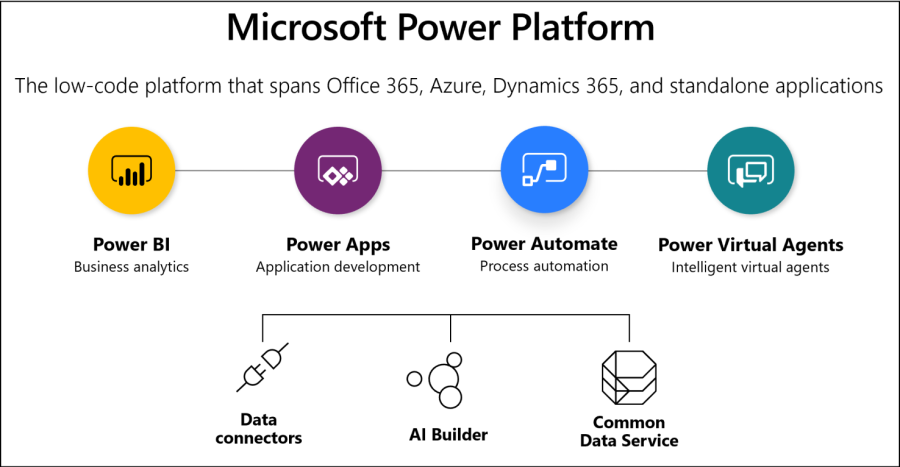
I built this on Logic Apps on Azure but you can do the exact same thing on Power Automate, Power Automate is a low code/no code application platform that allows companies to digitize business operations by easily building applications and workflows.
One of the connectors i am using is a premium connector and so if you need to use it you would have to get it through power automate, i have put some info around the pricing as below
Disclaimer
Pricing
Power Automate is licensed in one of the following ways:
As part of Office 365 with Microsoft Flow for Office 365 – this is a free license, allowing for a limited number of Flows to be run per month. This free license has the least amount of capabilities – it excludes access to Premium connectors, for example.
If this pricing doesn’t work for you there is a work around
Since Power Automate is an abstraction on an Azure service (Logic Apps) if you have an existing Azure subscription you can build your flow on your azure Subscription and you will go around the pricing of the Premium connector.
Note: this might not apply for all premium connectors.
Check here for Pricing for logic apps and for how the pricing model works .
Somet Kip
Preparing the Template
Since we want to create a dynamic document template, we need the controls in Word at this point.
Although these are deactivated in the standard installation, as a developer you can make them permanently available via the options menu, since they can be used for a variety of tasks.
To do this we go to the tab “File” – “Options” – “Customize Ribbon” and activate the item “Developer Tools” under the main tabs on the right side of the dialog box

After activation, the new “Developer Tools” tab is permanently available in every document, which you can use for all sorts of purposes.
Now that we’ve made the basic settings and activated the tools we need, we can go to the first part of the template
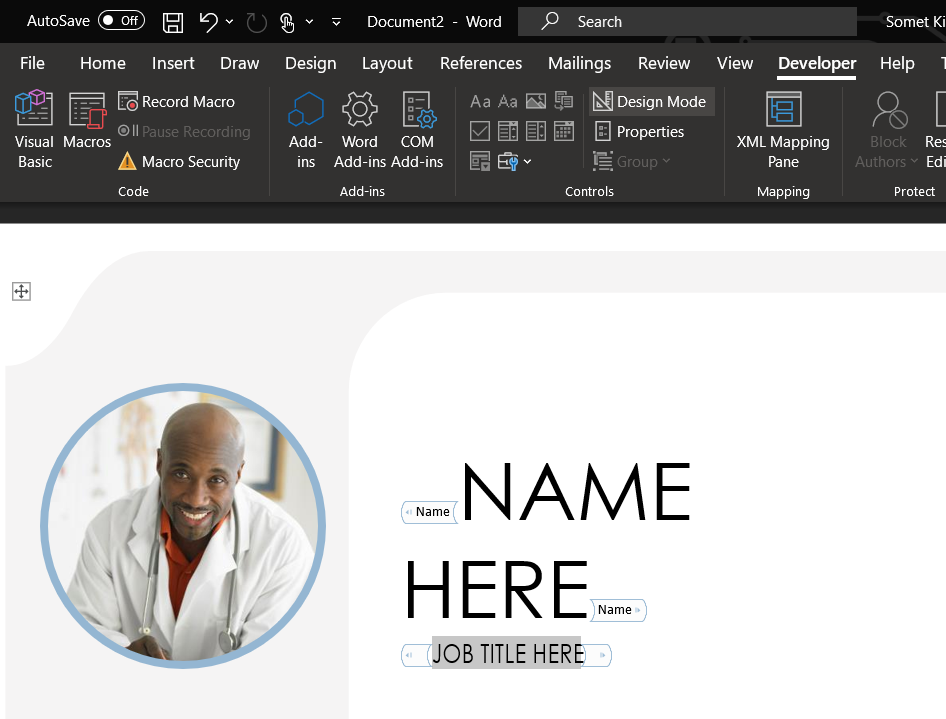
On your template click on elements that you would like the data to be dynamically populated as illustrated above.
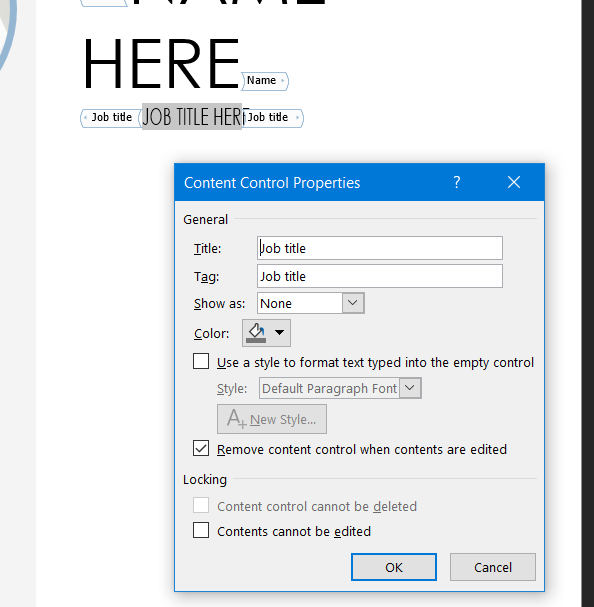
Go to the Developer Tab and Click on Properties under the controls section and you will get a Dialog window
Give your Control a name as you will need these to be able to identify whick feild it is in our flow
When your template is ready, you’ll need to save it as a Template (dotx), and you’ll need to save it where Power Automat/ Logic Apps can find it. I like to store my templates in a SharePoint document library.
To do so, use the Word File then Save As menu, then select your desired SharePoint site and document library then click Save.
Create Flow
Now, you can start building the flow.
Please follow the following steps if you are building a flow from scratch but if you have an existing flow skip the below steps.
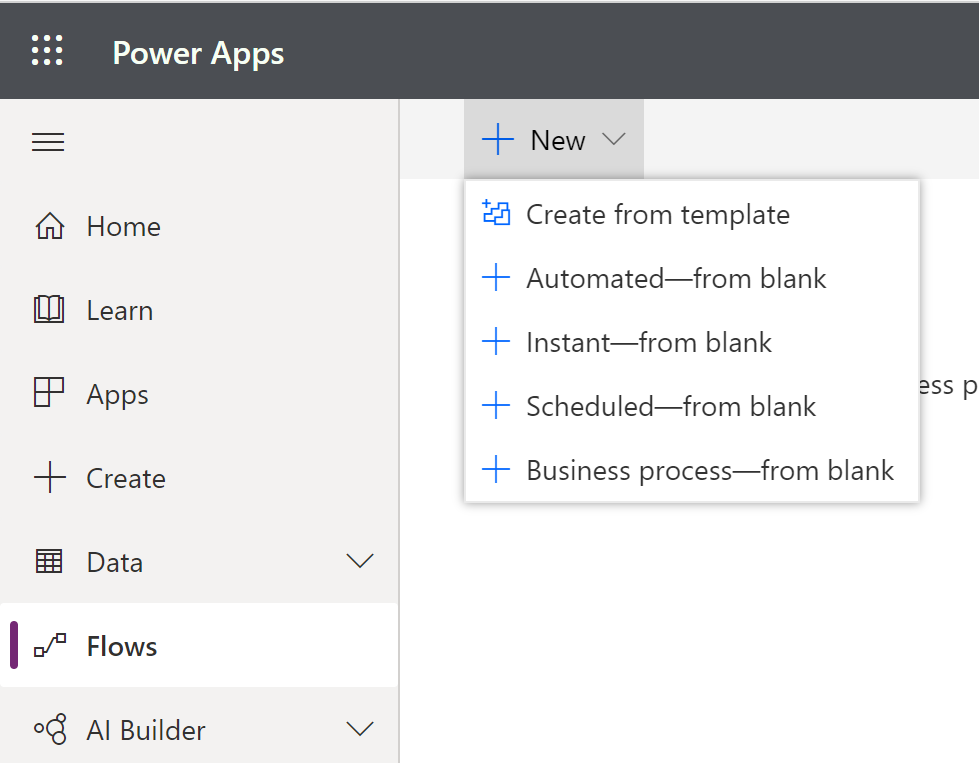
- Go to https://make.powerapps.com/ or Logic apps on Azure
- In the left navigation, select Flows
- From the + New menu, select Instant — from blank. Again, you can choose the best trigger for your own specific needs.
- From the Build an instant flow dialog, specify a name the you can select your “Trigger” under Choose how to trigger this flow, then click Create.
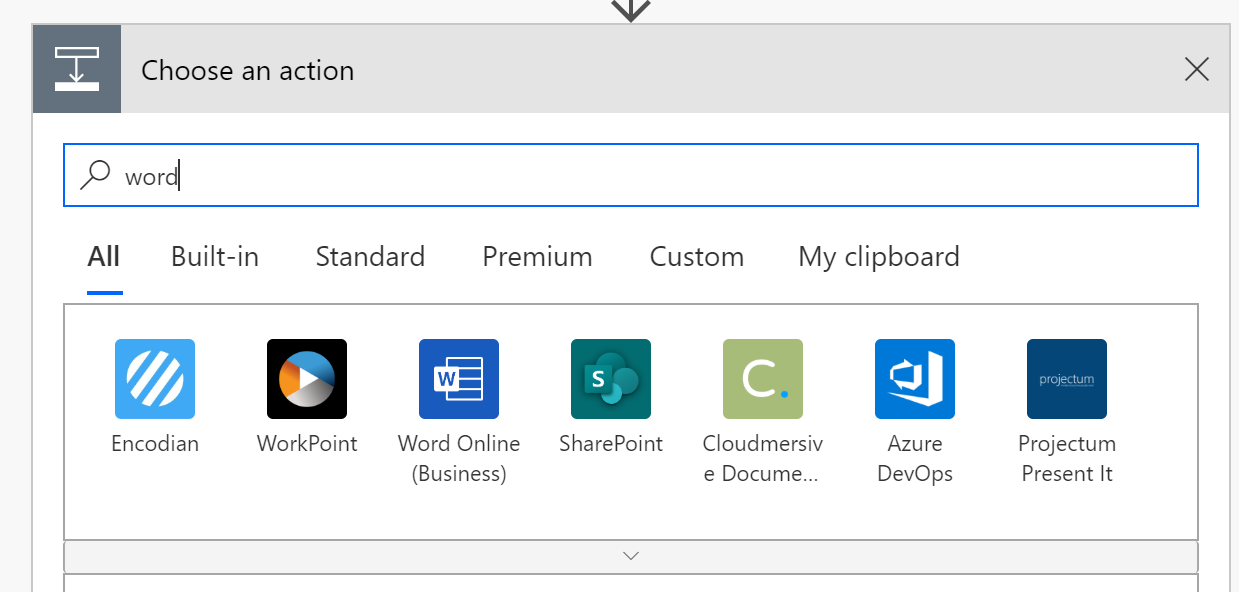
- Once you have created your trigger you can then add a step for the Word API
- In the Choose an action box, type Word and select Word Online (Business)
7. From the list of actions that appear, select Populate a Microsoft Word template

8. In the new Populate a Microsoft Word Template action, select the SharePoint site (or Group) where you saved your document, the Document Library where you stored the template, and pick the template from the file picker.
Populate these fields with values you’ll want to insert in the new Microsoft Word Document. Finally, you can then use the outputs of the action and send an email, save the document to another location, or any number of other actions.
Go try it out and let me know what you think about it.

The dotx doesn’t work. It needs to be docx??
LikeLike